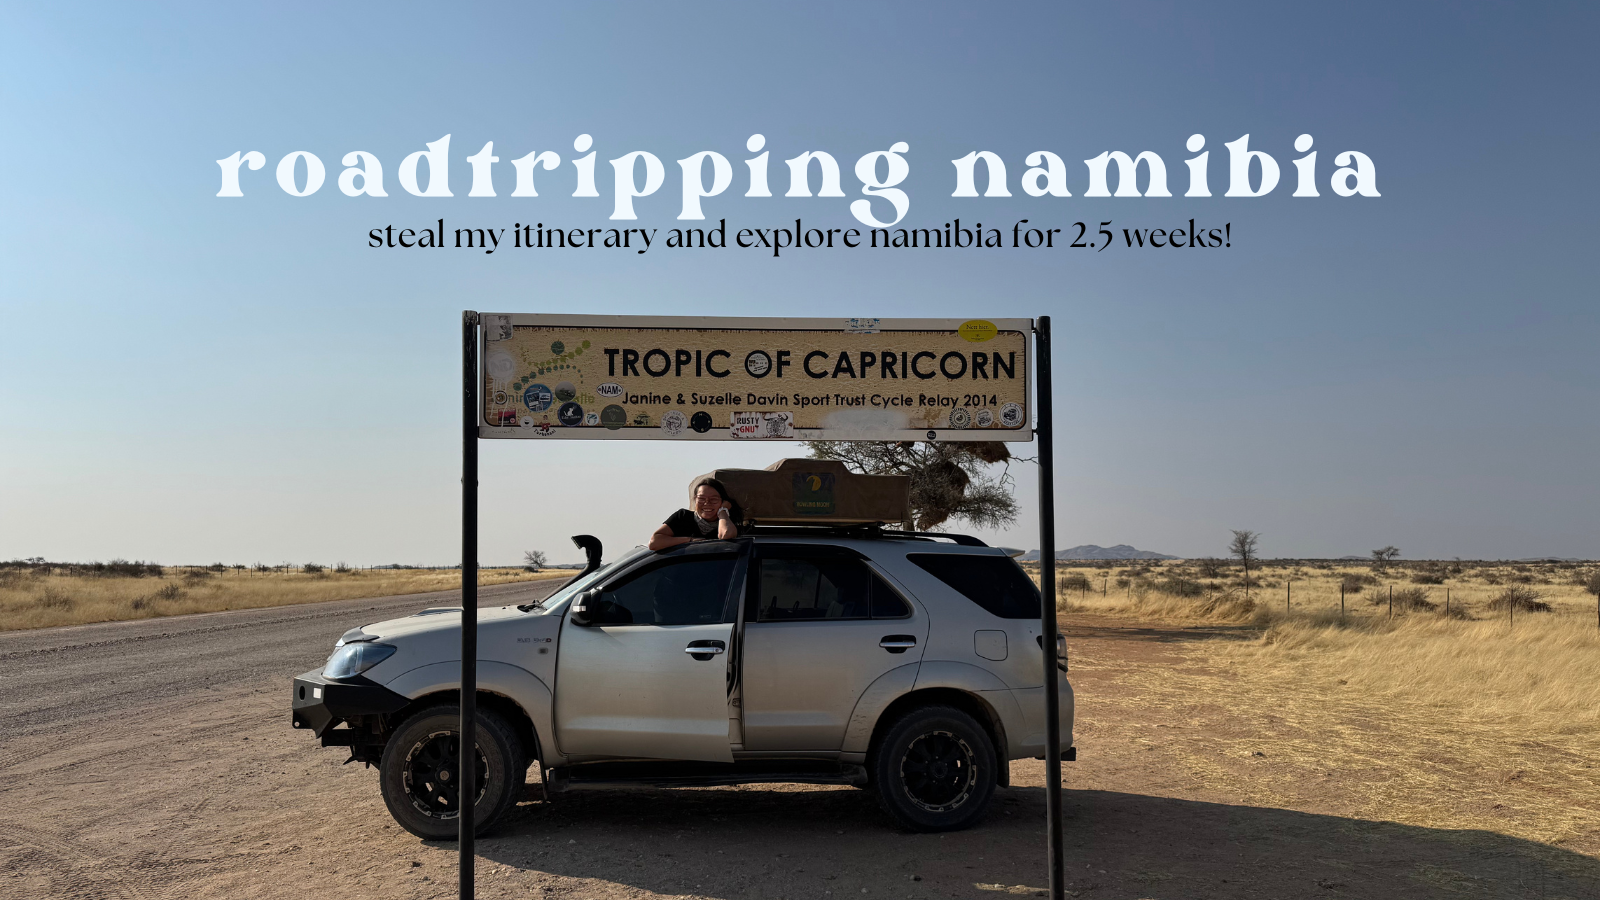
Namibia has been on our bucket list since pre COVID. Originally, we had plans for a South Africa + Namibia road trip but with the pandemic, we ended up only visiting South Africa. Fast forward five years and we finally did it! If you’re dreaming of an epic self-drive adventure through Namibia, this guide will help you plan every detail… from logistics to daily routes, must-see stops, practical tips and route options. You can tailor this to be either 2 or 3 week itinerary, picking and choosing what you’d like to see.
This guide is based on our real experience (complete with campsite booking chaos 🫠)… it includes what we did and what we’d change if we did it again. Expect long drives, plenty of gravel roads and landscapes that will leave you speechless. Let’s gooooooooo.
Namibia Highlights Covered:
-
- Etosha National Park safari drives
- Damaraland landscapes (option: desert adapted elephants)
- Skeleton Coast salt roads & seal colonies
- Walvis Bay kayak with seals & dune bashing
- Sand dunes of Sossusvlei & Deadvlei
- Granite mountains of Erongo & Spitzkoppe
- Classic D707 scenic drive to Lüderitz
- Kolmanskop ghost town
- Fish River Canyon (Africa’s largest)

Quick Facts: Namibia at a Glance
When to Go: April – October (dry season. best weather for overland travel)
Road Conditions: Good mix of tarred and gravel roads. Iconic salt roads along the Skeleton Coast.
Visa Info: Visa on Arrival (N$1600) available for many nationalities. eVisa pre-approval recommended (quicker at immigration).
Fuel: Fuel stations are common but always top up before long stretches. A jerry can helps for remote routes.
Internet & SIM: We decided to just rely off WIFI but you can get an Airalo eSIM.
Currency: Namibian Dollars (NAD) (1:1 with South African Rand)
Language: English widely spoken. Afrikaans widely spoken, plus Oshiwambo, Herero, Damara and other local languages.
Pro Tip: Namibia is all about the journey. Gravel roads are part of the adventure! Drive slowly, enjoy the views and always check your tires.
Namibian eVisa and Entry Requirements Border Checklist:
-
- Valid Passport (6+ months validity)
- Visa on Arrival. Payable on card, 1600 NAD per person
- eVISA pre-approval. Recommended for majority nationalities. Check with your nearest consulate.
- Yellow Fever Certificate. May be asked for if arriving from endemic regions
Namibia Road Trip Itinerary: 19 Days Itinerary
I’ve written an honest review of all the campsites we stayed at during our time in Namibia. You can read all about it here: The Best Campsites in Namibia: Photos & Honest Reviews
Note about our itinerary:
There is A LOT of driving and zig zagging around in our itinerary. The main reason: campsite bookings dictated parts of our route.
Case and point: Etosha National Park, Spitzkoppe and Sesriem (Sossuvlei). Etosha NP was fully booked except for one spot in Halali so we had to drive straight up. Similarly with Spitzkoppe, completely booked out except for one night.
There are alternative accommodation options I would’ve preferred to book but in the end of the day, it was still a lovely experience and no matter which way you do it, you won’t be disappointed. Of course you can spend multiple nights in one place but there was so much we wanted to see and needed to be at the RSA border by a set date, we ended up hopping around a lot more than anticipated.
In the following, I will share what was our actual itinerary and also share what I would’ve done if given the opportunity to redo!
Planning to Overland around Southern Africa?
I’ve been putting together a library of resources for you to use. Everything from itineraries to budget costs. Check out this library here:
- Curious about the cost of road tripping in Mozambique?
- Looking for an itinerary for overlanding Mozambique?
- All the campsites we slept at in Namibia and a review of them?
- How expensive is it to roadtrip around Madagascar?
- Or need an overland guide to Lesotho.
Our Itinerary breakdown:
Here’s how we structured our route, complete with major stops, accommodation options and highlights.

Day 1: Enter via Trans Kalahari → overnight in Gobabis
Kilometers Driven: 620 km
Type of Roads: Tarred roads all the way
Accommodation: Goba Lodge. Camping cabin. Shared ablutions, shared kitchen area and washing up.
Driving from Maun (Botswana) into Namibia, we opted for the Trans Kalahari Highway. We initially wanted to take the road via Caprivi Strip but there were no other dates available for the Halali Etosha Campsite so, change of plans. It is quite a straight road with not too much to see. If you’ve got time, stay overnight in Central Kalahari National Park, Botswana to break up your journey a bit.
Day 2: Gobabis → Etosha National Park
Kilometers Driven: 654 km
Type of Roads: Tarred roads all the way until you enter Etosha National Park.
Campsite: Halali Campsite (NWR). Shared ablutions, communal washing up area, braai stand, electricity.
We drove up the C14 to Grootfontein and continued on the C42 to Tsumeb. You’ll join the B1 and turn off onto the C38 which will take you to the East entrance of Etosha National Park (Von Lindequist Gate) and to Namutoni Rest Camp. We continued and did a self game drive from Namutoni to Halali Campsite.
Day 3: Etosha National Park
Kilometers Driven: 166 km
Type of Roads: Tarred roads all the way
Campsite: Gondwana Etosha Safari Camp. Shared ablutions, communal washing up area, braai stand, electricity.
We woke up at sunrise and took a lazy morning. Halali Campsite has a watering hole in camp so spot some animals there for brekkie. Unfortunately for us, there was not too much game around but what a spot for a morning cuppa. There’s plenty of birdlife!
We drove around Etosha NP, keeping relatively in the central part of the park before exiting at around sundown to set up camp at Etosha Safari Camp. A nice thing about the Safari Camp was that they had live music and an amazing atmosphere. Very typical roadhouse atmosphere and vibe going on there.
Day 4: Etosha National Park
Kilometers Driven: 204 km
Type of Roads: Tarred roads all the way
Campsite: Eldorado Camp. Shared ablutions (donkey shower), communal washing up area, braai stand, electricity.
Gates to Etosha open at sunrise – there’s a line of cars already waiting. While we didn’t get there for sunrise, we got there relatively early (0800hrs) to start our self game drive. We mainly explored the immediate Eastern side of the park and ended up finding a lion! We didn’t go as far as Dolomite Camp but you could easily do that if you planned to drive all day/camp there.
Day 5: Etosha National Park → Damaraland
Kilometers Driven: 299 km
Type of Roads: Tarred roads until Karamajab and then it’s gravel roads.
Campsite: Hoaba Campsite. Private ablutions (donkey shower, flush toilets), washing up area, braai stand, fire pit, no electricity.
Welcome to Mars. Damaraland is all about red-rock landscapes, granite outcrops and Namibia’s famous gravel roads. Here you’ll start to feel that it’s about the journey, not the destination. Rolling up to Hoaba, you’re greeted with these towering granite rocks and rock formations. Unfortunately the self campsites were fully booked at Hoaba so we opted for the safari tent accommodation.
![]()

Day 6: Damaraland
Kilometers Driven: 53 km
Type of Roads: Graded gravel roads
Campsite: Gondwana Palmwag Campsite. Private ablutions, washing up area, braai stand, benches, electricity.
Take it easy! At Hoaba Campsite, there’s a trail you can do around the property. We opted to do it after breakfast and packing down our camp. If the sun is blazing you could also take a quick dip in the pool in the morning. You’ve only got a short drive to Palmwag today. Or you can try get to Palmwag early and join one of the many activities on offer… like looking for the desert adapted elephants?
Day 7: Damaraland → Skeleton Coast
Kilometers Driven: 288 km
Type of Roads: Graded gravel until you get to Springbokwasser gate. Then it’s salt roads.
Campsite: Mile 108 (NWR) – self contained. Private ablutions, washing up area, firepit. No electricity but there’s a point to charge via USB. No wind shelter.
Time to hit the coast! While it’s gonna be a decent drive to the Skeleton Coast National Park Springbokwasser gate, it’s quite a nice drive through the dramatic landscapes Namibia is known for. At Springbokwasser gate, you will get a transit pass to drive through the national park and exit out of Ugabmond Gate. This transit pass is only valid if you exit the same day. There’s no accommodations between the two gates and you’re not allowed to drive offroad here. However, if you’re feeling adventurous, you can head north to Torra Bay.
Note about driving on salt roads:
It’s easy enough to drive on, no different to gravel or tarred roads. However, it can be very slippery when wet or there’s a lot of moisture in the air (some people liken it to driving on black ice). We opted to take it easy so we would drive this road at midday so the sun would’ve “dried” up the road.
You’ll get to your accommodation. Depending on when and where you’re staying, you could also visit the Cape Cross Seal Colony.

Day 8: Skeleton Coast → Walvis Bay
Kilometers Driven: 240 km
Type of Roads: Salt road until you get to Henties Bay then tarred roads all the way
Campsite: Selkie BNB (private room and bathroom)
We opted to visit the Seal Colony this morning since we were going to pass it on our way to Walvis Bay. However, depending on what you are planning to do in Walvis Bay, you might want to skip visiting the Seal Colony here (175 NAD per international visitor). There is a really strong odor of thousands of seals and death. The stench stuck to my hair!
Day 9: Walvis Bay (Sandwich Harbour)
Kilometers Driven: 0 km
Type of Roads: Tarred roads all the way
Campsite: Selkie BNB (private room and bathroom)
Our splurge activity: Kayaking with the Seals + Sand Dune Bashing (7000 NAD for 2)
We went kayaking with the seals at Pelican Point in the morning followed by a Dune bash in the afternoon with Desert, Dunes and Dust Tours. If you’re deciding to go kayaking with the seals, I would probably suggest you just do that instead of visiting the colony at Cape Cross. My main justification for this is that while you don’t see a massive colony, you do get more up close with them and you see how playful they are in the water.
The Dune bash is really fun if you haven’t done anything like it before. You get some amazing viewpoints and it’s quite cool seeing massive dunes rise from the Atlantic Ocean.
Day 10: Walvis Bay → Moon Valley
Kilometers Driven: 85 km
Type of Roads: Tarred roads all the way. Gravel when you turn off to the Rest Camp.
Campsite: Goanikontes Oasis Rest Camp. Private ablutions (hot water), washing up area, braai stand, electricity.
On the way to Goanikontes, we made a pitstop in Swakopmund. However, it might’ve just been where we were but we didn’t find it all that interesting and didn’t necessarily feel the safest so we cut our visit short. Another traveller we met liked Swakopmund so please – go visit and formulate your own opinion! Don’t let my experience influence you.
It’s a short drive to the Moon but quite an amazing one. Especially when you start descending to Goanikontes Oasis. You’ll probably stop for plenty photo opportunities. At Goanikontes Oasis, there’s a couple of walks around the area – just be sure to ask the reception and they will share some routes with you.

Day 11: Moon Valley → Erongo
Kilometers Driven: 269 km
Type of Roads: Gravel road until you join back on the B2. Tarred along the B2. D2315 and D2306 are gravel.
Campsite: Erongo Rocks. Camp Granite – private campsite with ablutions (bucket shower, flush toilet), braai stand, washing up area and fire pit. Self sufficient campsite. No electricity.
This is where we start looping around on ourselves. We went from one planet to another because this region is prized with it’s massive granite rocks. Similar to the scenery you would’ve seen in Damaraland (which is part of Erongo). We had a bit of a lazy morning and took it really chilled (maybe you’re noticing a theme with our short driving days!). We hit the road to Erongo Rocks. Although be mindful, the gates close at 1800hrs so don’t take it too easy!
There’s so many hiking trails to explore on the Erongo Rocks property. There’s a hike up the mountain where you can catch sunset from. If you’re on the Camp Granite site, there’s a lovely lookout point (with the view of the mountain) where you can enjoy your sundowner. Take it easy, enjoy life off the grid.
Day 12: Erongo (Spitzkoppe)
Kilometers Driven: 145 km
Type of Roads: D2306 and D2315 are gravel. Hit the B2 which is tarred and back on corrugated gravel roads for D1918 and D3716.
Campsite: Spitzkoppe Tented Camp. Private ablutions (donkey), washing up area, braai stand, electricity.
We used this morning to explore the one of the hiking trails on the Erongo Rocks property. It’s well marked and easy to navigate so you shouldn’t get lost! After that we started making our way back to the B2 and coming back on ourselves before turning off for Spitzkoppe. The roads to Spitzkoppe is really corrugated so take your time! You don’t want to have any mechanical issues on this road… The view coming into Spitzkoppe is amazing, because it’s flat and seemingly out of nowhere, Spitzkoppe (yes, that’s the name of the mountain) rises from the ground. It’s also known as the Matterhorn of Namibia, because of how iconic it is.

Day 13: Spitzkoppe → Windhoek
Kilometers Driven: 305 km
Type of Roads: D1918 and D3716 are gravel. Both pretty corrugated and rough. B2 is tarred all the way to Windhoek, although there are road works happening.
Campsite: AirBNB accommodation (granny flat).
Wake up early to catch sunrise (or early morning) inside Spitzkoppe Reserve. You’re pretty much free to roam the place, obviously as it is a campsite, just be mindful not to go into people’s camps if they are there. It’s a stunning place to explore. We even made some hot beverages and had our breakfast overlooking Spitzkoppe.
We slowly made our way to Windhoek and settled into our accommodation and spent the rest of the day relaxing, recuperating and just enjoying the little luxuries!
Day 14: Windhoek → Nauams
Kilometers Driven: 160 km
Type of Roads: C26 is tarred in the beginning but then it’s gravel. Decent but some parts are corrugated.
Campsite: Nauams Mountain Camp. Private ablutions (donkey shower and flush toilet), washing up area, braai stand and fire pit. Electricity available.
On the road again! We used the morning to run some errands, explore a little bit of Windhoek before heading out towards Nauams. The journey to Nauams is pretty nice. Be sure to get there relatively early! The Mountain Camp offers plenty of different activities – like hiring a mountain bike or hiking the many trails onsite.
Day 15: Nauams → Sesriem
Kilometers Driven: 156 km
Type of Roads: Corrugated gravel roads. Rough patchs.
Campsite: Sossus Oasis Campsite (private ablutions, washing up area, braai stand, fire pit, shelter).
One of the classics. From Nauams, you will venture up towards Spreetshoogte Pass, a beautiful road taking you high over the mountains before you meander down to Solitaire. There’s a famous bakery here, so many people told us about it! It is said to be the best apple pie in Namibia, started by Moose (who has since passed). However, over a decade later, his legacy still lives on through this apple pie! So we obviously made a stop to try it. For a town called Solitaire, you would expect it to be pretty empty and quiet but it is anything but – especially if you come at lunch time when all the tour operators are there!
From Solitaire, prepare yourself for the next 90 km of corrugated roads. Namibia had some pretty heavy rains the months before washing a lot of the roads. However, as the rainfall happened so close to high season and it’s a heavy traffic road with all the tourists, they didn’t get to repair the roads.

Day 16: Sesriem (Sossusvlei, Deadvlei, Big Daddy Dune) → Betta
Kilometers Driven: 275 km
Type of Roads: C27 is extremely corrugated and slow going. Probably the worst gravel road we’ve encountered on our 3 months journey!
Campsite: Betta Rest Camp. Private room with ensuite.
I was feeling extremely poorly this day so unfortunately, it was a bit of a write off. However, we pushed through. We got to the main gates early enough to join a long line of cars. First gate is easy registration, you get assigned a number before heading to the next gate where you pay for your entrance.
It’s another 60km of tarred roads. Don’t gun it the whole way! Rather take it easy because there’s plenty of dunes and amazing places to admire before you get to Big Daddy Dune. *Once you reach the end of the tarred roads, you’re at the main parking lot. From here, you can either take a shuttle (200 NAD) or brave driving the sand roads yourself only if you have a 4×4 and know how to use it.* To be honest, it’s not that bad since the tracks are pretty clearly marked.
*double check if you’re able to self drive from the 2×4 carpark to the 4×4 carpark. As of mid Dec 2025, private cars weren’t allowed to drive this stretch.
Sossusvlei itself is different to Deadvlei – which I think can be a bit confusing for some. For Sossusvlei, it’s a quick walk from the carpark to get to and you can hike up Big Mama Dune. It’s the furthest point you’ll get to. Whereas Deadvlei is located near Big Daddy Dune. It is quite a walk to get to Deadvlei so avoid doing it in the middle of the day when the sun is at its strongest.
Driving to Betta on the C27 is probably the most corrugated road we’ve had the displeasure of driving on. It stops about 10km before Betta. We made an unexpected overnight stop here.
Day 17: Betta → Ludaritz
Kilometers Driven: 332 km
Type of Roads: D707 is gravel, in good condition. B2 will be tarred.
Campsite: Wild Horses B&B (Private room with ensuite). Breakfast included.
We did what has been coined as the classic Namibian road – D707. This truly is about the journey as the roads are really fun to drive and the scenery makes it enjoyable too. It’s quite a drive down to Ludaritz so make a pitstop at Aus at the Bahnhof Hotel for some lunch before continuing on your journey towards Ludaritz.
If you’re organised enough, you can arrange for a photography permit for Kolmanskop (the ghost town we will be visiting tomorrow) so you can have access to it from sunrise. Photography permits cost 400NAD.
Otherwise, have a wander of Ludaritz, there are so many colourful buildings around the town, which we weren’t expecting. We were suggested to try out the Portugese Fisherman Restaurant and I can confirm, it was great food!

Day 18: Ludaritz → Fish River Canyon
Kilometers Driven: 408 km
Type of Roads: B2 is tarred roads. Graded gravel roads for C12.
Campsite: Gondwana Canyon Road House Campsite
Rise and shine! We’re going to explore the abandoned diamond mining town of Kolmanskop! We didn’t opt for the photography permit – although it’s been recommended. We did go early and explored the abandoned town for ourselves, visiting the different buildings before joining on the tour. The tours are included in your entrance and are daily at 0930hrs and 1100hrs (they last for ±30mins).
We journeyed towards Africa’s biggest canyon (and the world’s second biggest!) – Fish River Canyon. However, we wanted to save it for the morning since we would be heading that way so we settled into our campsite and enjoyed our final night in Namibia.
Day 19: Fish River Canyon → Border Cross into South Africa (alternatively, loop back to Windhoek)
Kilometers Driven: 700+ km
Type of Roads: Gravel until you get back onto the B2
Campsite: where you choose to go, we camped in RSA.
Another early morning! Make your way to Fish River Canyon to admire the sheer scale of it. It almost looks as if there’s a canyon in a canyon, it’s really hard to describe. There’s a couple of trails and viewpoints to explore and hike however, we were a bit short on time and needed to border cross into South Africa.

Where could improvements be made?!
I’ve got heaps of suggestions to make your roadtrip enjoyable. Firstly, spend more time in certain places than we did. But that’s all part of it – you can learn from my mistakes 🙂
Etosha National Park:
For Etosha National Park, we would’ve preferred to do it quite a bit differently. Optimise your time in the national park by doing the following:
- Day 2: Windhoek → Etosha National Park
Stay either at Namutoni Camp in Etosha or Onguma Tamboti Camp.
Tip: Staying outside allows you to save a day on national park fees but you’re still a short drive from the gates in the morning. - Day 3: Etosha National Park
Stay in Halali. You should do this for at least one night! The watering hole is a very cool experience. Halali is also in the middle of the park gates (between Namutoni and Anderson Gate), so it’s centrally located. - Day 4: Etosha National Park
There’s a couple of options here. You could either:
1) spend another night in Halali or
2) drive further west into the national park to Olifantrus Camp if you want to spend more time in the park exploring.
3) If you want to save yourself another day of national park fees, considering staying outside the park at Etosha Safari Camp. - Day 5: Leave for the Damaraland
Damaraland:
For Damaraland, rather than spend a single night at Hoaba Camp and Palmwag Camp – knowing what I do now, I would consider spending two nights at one of the sites. This is especially true if you want to join in on one of the activities on offer – desert elephant trekking or some of the offroad routes available.
Erongo + Spitzkoppe:
For our itinerary, we had to do a little loop and come back on ourselves. As mentioned earlier, this is mainly because of the campsite availabilities. Alternatively, I would suggest after the Skeleton Coast and Walvis Bay/Swakopmund, head to → Moon Valley → Spitzkoppe → Erongo Rocks → Windhoek / down to Sesriem
Sesriem:
I would highly recommend spending two nights in Sesriem rather than just one. It will give you the best opportunity of visiting Deadvlei, Sossuvlei, the Dunes and Sesriem canyon without having to rush yourself. Unfortunately for us there was no camping available for more than a night.
By staying two nights, you’ll be able to leave in good time to make it to the accommodations along the D707. It is a beautiful part of the country and I was beating myself up that we weren’t able to make it to our prebooked campsite because I was feeling way too poorly!
Fish River Canyon:
Due to our flight, we had to squeeze Fish River Canyon in but I would recommend you stay there for two nights at least! There’s some day trails you can do and plenty of viewpoints to visit. Remember to have a 4×4 car as it’s all gravel and corrugated roads here… If you’re adventurous, experienced and fit (+ a self sufficient hiker), you might consider doing the Fish River Canyon Trail for a week. However, to do this trail, you will need permits and be a group of at least 3.

Enjoy Namibia – it’s about the journey, not the destination 😉
Absolutely. Namibia is not a destination you rush through. Long days on gravel roads, early starts and dust everywhere. You might even start questioning yourself why did you plan such long driving days… and then suddenly you’re watching elephants at a waterhole, standing beneath towering dunes or driving a road that feels like it goes on forever with no one else in sight. And you realise – this is why!
This road trip reminded me that Namibia isn’t about ticking off sights… Some days will test your patience (corrugation, wind, bookings falling through) but those are often the same days that end with the most unforgettable sunsets and stories you’ll tell forever.
If you take anything from this guide, let it be this: build in flexibility, don’t underestimate driving times and give yourself more nights in fewer places if you can. Namibia rewards those who travel intentionally.
Whether you follow this itinerary exactly or use it as a loose framework for your own adventure, I hope it helps you plan a road trip that feels both wild and manageable. Namibia has a way of getting under your skin and if you’re anything like us, you’ll already be dreaming of when you can come back.
TLDR? Namibia Road Trip Essentials
- Self-drive is the best way to experience Namibia. But distances are long and roads are slow
- Fewer places, more nights = a better experience (don’t try to rush it)
- Plan fuel stops carefully, especially in remote areas
- Camping and lodges book out early in peak season — lock in key nights
- Wildlife sightings aren’t forced — patience pays off
- Expect challenging days… followed by unforgettable sunsets
- Namibia rewards flexible travellers who focus on the journey, not just the highlights
Best for: independent travellers, couples, slow travellers & first time Africa road trippers
Leave a Reply